4 Halloween Banner Ideas Online | Cheap Options | Printmoz
What’s not to love about Halloween? It’s the only holiday where you get to dress up like Spiderman or Dracula in public with no judgemental side eye glances. Halloween doesn’t have to be boring. Get into the Halloween spirit with these awesome DIY Halloween party banner templates that are both inexpensive and easy to make and are cheap alternatives to higher quality banners.
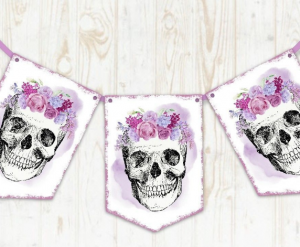
1. Skull bunting banner
Skulls and pumpkins are the most obvious representation of Halloween. This skull banner is inexpensive and not so scary that your kids are running away from the decorations.
Things you’ll need:
- Burlap
- Pencil
- Ruler
- Acrylic paint/ black and orange
- Artist paint brush
- Artist paint brush
- Kite string or thin yarn for tassels
Directions:

First thing you want to do it cut the burlap into 8”x 10”, you can readjust this measurement to whatever size you feel comfortable with. You can either cut the burlap into triangles or cut them as rectangles and then cut out the bottom part into triangles to make it look like a banner. You can make as many burlap rectangles as possible.
You can print out skull templates online or use a skull stencil to trace it on the burlap. Trace the skull heads with black paint or marker. Paint the eyes, nose, and mouth black. Repeat this step on all the burlap rectangles you’ll be hanging up. Beneath the skulls, draw and paint bow ties with orange paint. Leave the skull heads to dry.
Move on to make black ribbon tassels. Wrap the ribbon around your four fingers, hold the tip and cut out one end of the ribbons. Tie the other end of the ribbon and the tassels are done.
Its time to hang them. To hang the banners, use hot glue to adhere the top back of the burlap banners to the string or jute cord. Tie this banner to your doorway or to your mantle. You can spray spiderwebs on the banner to make it look a little spookier.
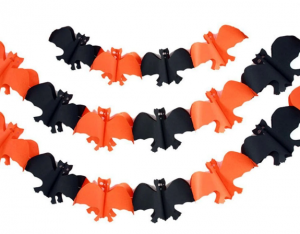
2. Bat Banner
Apart from skulls, orange, and pumpkins, bats are also a staple Halloween decoration. They kinda look spooky and cool, real bats are way scarier and spookier.
Things you’ll need:
- Cardstock
- Printer or pen
- Scissors
- 1/16” hole punch
- Wire connector coils
- Wire cutters
Directions:

You can either sketch out the bat silhouette or print out on cardstock. Once you’ve found a bat silhouette you like, print four per page on black cardstock. You can also print the bats on white cardstock, but you’ll be using a lot more ink to achieve the right look. if you’re trying to be more creative, you can sketch the bat freehand or make a tracing template.
Cut out as many bats as possible to make the banner. You should make as much as 24-40 to make as many strands as possible. Use the hole punch to make holes at the tip of the bat wings.
Next, make wire connector coils by wrapping the wire around a pen or pencil about seven times, then snip the end. You’ll need as many coiled wires as possible, each of the wires should be about 8-10 inches.
Connect one end of the coil through the hole in a bat wing about two times to make it secure. Then take another wire an connect it to the other bat wing to connect them together.
You can either stretch the wire or smoosh it, depending on what you’d like the outcome. When you’ve strung enough bats, hang them. if you don’t have a wire, you can easily replace that with jute cord, or twine for this funny Halloween sign.
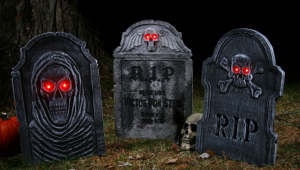
3. Tombstone ‘RIP’ Banner
Tombstones can never be played out during Halloween, they are quite cool and artistic, especially when you make it yourself. This typed is a little longer and a little time consuming, but the result is cooler. Foam board is ultra lightweight and quite easy to cut through.
Things you’ll need:
- Black foam-core board; 32” x 40”
- X-ACTO Knife
- White acrylic paint
- White sharpie oil paint pen
- Chalkboard paint; 2 cans
- Wet wipes
- Paint brushes & foam paint applicators
- Inkjet printer
- Gorilla glue waterproof clear grip adhesive
Directions:

To begin, enlarge the images of the tombstones you want to use to make them as large as possible. You might need to print it out on several papers and arrange them like you will with puzzles.
Once you’ve downloaded and printed the tombstones, arrange the puzzle pieces correctly and tape together. Cut out the tombstone around the outlined borders. Place the tombstone template over the foam and trace it out on the foam board.
Follow the traced pattern and cut out using an X-ACTO knife. Make sure the X-ACTO knife you’re using is big enough to cut through foam board, smaller knives will leave jagged edges. Use the latex chalkboard paint to paint the front, back and edges tombstone. Make sure to cover all of the paper and foam edges with the latex paint.
Foam core warps and bends easily when it is wet, so try using objects to hold it down to prevent it from doing so. Leave the foam boards to dry.
Use the white acrylic paint to paint the edges of the tombstone. Make the lines a little messy to imitate chalky board. You can either write on the boards with chalk for temporary writing or use paint for permanent writing. Either way, it’ll come out awesome. Print out the sayings you want on your tombstones e.g. happy Halloween, here lies, or a drawing. You need to size the writing to fit your tombstones. You can cut it on sheets sized 11”x 8.5” (a normal sheet of paper).
Lay the paper on the foam tombstone and outline the words with a pencil. Go out the words with white sharpie paint pen within the lines you added with the pencils. Repeat this on all the tombstones. Spray the tombstones with flat crystal paint primer to seal the paint for weatherproofing. Use objects to hold them down again to prevent warping.
Punch a hole in either sides of the tombstones and hold them up with jute cord or any other strong cord or string you can find.
If you don’t want to turn this into banners, you can stick them to the ground using Gorilla Glue Clear Contact Adhesive. This banner isn’t spooky, but this Halloween party sign definitely makes a statement for any announcements or festivities.
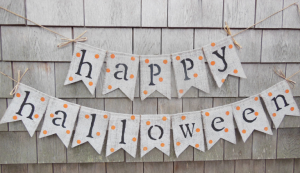
4. Happy Halloween burlap banner
This banner is quite similar to the first banner but a little different.
Things you’ll need:
- Burlap ¾ yard
- Black cord
- Glue stick
- Scissors
- Black acrylic paint
- Letters stencil or printed
Directions:

Cut the burlap into 14 rectangles of 5.5” wide by 8.5” tall. prevent the edges from fraying with school glue or a spray stopping product. Trace the printed letter patterns on the burlap. For Happy Birthday Halloween Banners simply add a birthday message.
Use acrylic paint and a small brush to trace and fill in the design. Leave the paint to dry. Cut 11 feet of black cord, you’ll want to have extra length at the end of the banner. For a shorter banner, use 9 feet of cord.
Use a glue gun to attach the banners to the cord, you can use an iron to fold the banners from the top, this makes it easy to place the glue and cord. Give at least ¼ inch from each banner.
Knot cord at the end. Before hanging the banner, lightly spray each banner with the black spray paint. This gives the banner a nice edge, leave the paint to dry out completely. You can substitute the spray paint with diluted paint on the edges if you don’t have spray paint.
Now your Halloween banner is ready to be hung up for display!
If you liked these ideas check out our refreshing 4th of July ideas as well!

Leave A Reply